Notification
Notification을 해석해보면 "알림"이다.

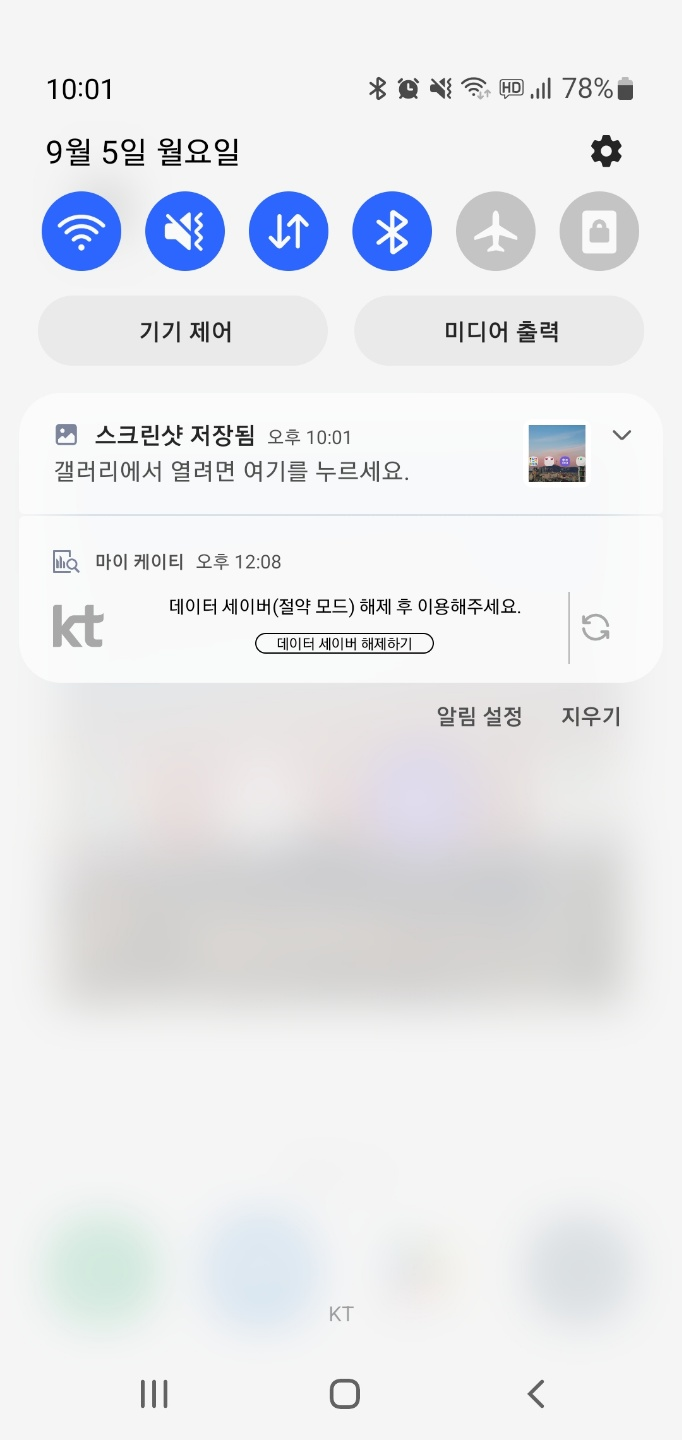
평소 핸드폰을 사용하다 보면 문자가 왔을 때, 부재중 전화가 와있을 때, 스크린샷을 찍었을 때 등 여러 경우에서 알림창이 뜨는 것을 확인할 수 있다.
이와 같은 기능을 구현하는 것이 Notification이다.
Notification은 NotificationManager의 notify() 함수로 발생한다.
notify() 함수에는 NotificationCompat.Builder가 만들어 주는 Notification 객체를 대입하며 이 객체에는 알림 정보가 저장된다.
또한 NotificationCompat.Builder를 만들 때 NotificationChannel 정보를 대입해줘야 한다.
즉, NotificationChannel로 알림 채널을 만들고, 이 채널 정보를 대입하여 NotificationCompat.Builder를 만든 후, Builder를 통해 Notification 객체를 만든다.
이 Notification 객체를 NotificationManager의 notify() 함수에 대입하는 구조이다.
Notification 객체를 만드려면 우선적으로 NotificationCompat.Builder가 필요하다.
이때 NotificationCompat.Builder를 만드는 방법은 Oreo(API 레벨 26, 안드로이드 8.0)을 기준으로 차이가 있다.
Oreo 버전 이전에는 Builder를 생성할 때 NotificationChannel 정보가 필요하지 않았다. 오직 Notification Builder만을 사용하여 Notification을 생성한 것이다. NotificationCompat.Builder(this)만으로 생성이 가능한 것이다. 또한 시스템 단에서 Notification을 제어할 수 없었다.
Oreo 버전부터는 NotificationChannel을 생성하여 이 채널의 식별값을 빌더의 생성자 매개변수에 지정해야 한다.
즉, NotificationCompat.Builder(this, channel)로 선언된다. Oreo 버전 이전과는 달리 시스템 단에서 제어할 수 있고, Channel에 따라 설정을 바꿀 수도 있다.
NotificationChannel(CHANNEL_ID: Int, name: String, importance: Int)매개변수 중 importance는 이 채널에서 발생하는 알림의 중요도를 나타내며, 상수로 지정한다.
다음과 같은 종류가 있다.
| 중요도 상수 | 설명 |
| NotificationManager.IMPORTANCE_Default | 기본 알림 중요도이며, 모든 곳에 표시되며 알림음이 울린다. |
| NotificationManager.IMPORTANCE_HIgh | 더 높은 중요도로, 모든 곳에 표시되고, 알림음이 울린다. 전체 화면 인텐트를 사용할 수 있다. |
| NotificationManger.IMPORTANCE_Low | 중요도가 낮으며, 알림이 울리지 않는다. |
| NotificationMangager.IMPORTANCE_MIN | 중요도가 가장 낮으며, 알림이 울리지 않고, 상태바에도 표시되지 않는다. |
| NotificationManager.IMPORTANCE_NONE | 중요하지 않은 알림으로, MIN과 비슷하다. |
| NotificationManager.IMPORTANE_UNSPECIFIED | 사용자가 중요도를 표시하지 않았음을 나타낸다. 이 값은 기본 설정을 유지하기 위한 것으로 실제 알림과 연결되어서는 안된다. |
또한 Notification Builder를 작성할 때, 알림에 필요한 여러 기능들을 추가할 수 있다.
이들에 관한 것은 다음 사이트를 참고하면 된다.
https://developer.android.com/reference/android/app/Notification.Builder
Notification.Builder | Android Developers
android.net.wifi.hotspot2.omadm
developer.android.com
이제 구현을 해보자.
구현
우선 알림의 content와 channel을 설정해야 한다.
이때, channel은 CHANNEL_ID로 구분하는데, 네이밍 컨벤션으로 알 수 있듯이, 상수값을 가진다.
임의로 어떠한 값을 지정해주면 된다.
private const val CHANNEL_ID = 1023content는 위에서 말한 다양한 기능들에 포함되어 있다.
android developer를 참고하면 된다.
여기서는 간단히 setConentTilte()과 setContentText()만 보자.
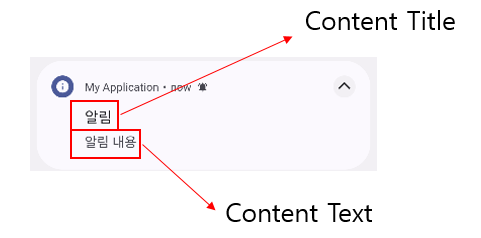
이처럼 알림창이 떴을 때, 알림의 제목으로 띄울 텍스트를 설정하는 것이 setContentTitle()이고, 그 아래 띄울 텍스트 내용을 설정하는 것이 setContentText()이다.
이 외에도 다양한 기능들이 있는데, 내가 사용한 것만 보도록 하겠다.
val builder = NotificationCompat.Builder(this, CHANNEL_ID)
            .setSmallIcon(R.drawable.ic_baseline_info)
            .setContentTitle(getString(R.string.notification_name))
            .setContentText(getString(R.string.notification_text))
            .setPriority(NotificationCompat.PRIORITY_DEFAULT)
            .setContentIntent(pendingIntent)
            .setAutoCancel(true)
이처럼 builder를 작성했다면, 이제 채널을 만들어야 한다.
private fun createNotification() {
        if(Build.VERSION.SDK_INT >= Build.VERSION_CODES.O) {
            val name = getString(R.string.channel_name)
            val descriptionText = getString(R.string.description)
            val importance = NotificationManager.IMPORTANCE_DEFAULT

            val channel = NotificationChannel(CHANNEL_ID, name, importance).apply {
                description = descriptionText
            }

            // NotificationManager 객체 얻기
            val notificationManager: NotificationManager = getSystemService(Context.NOTIFICATION_SERVICE) as NotificationManager

            // channel을 notificationManager에 등록
            notificationManager.createNotificationChannel(channel)
        }
    }
이처럼 NotificationChannel에 인스턴스를 넘겨줌으로써 채널을 등록할 수 있다.
전체적인 코드를 확인해보자.
private fun createNotification() {
    if(Build.VERSION.SDK_INT >= Build.VERSION_CODES.O) {
        val name = getString(R.string.channel_name)
        val descriptionText = getString(R.string.description)
        val importance = NotificationManager.IMPORTANCE_DEFAULT

        val channel = NotificationChannel(CHANNEL_ID, name, importance).apply {
            description = descriptionText
        }

        // NotificationManager 객체 얻기
        val notificationManager: NotificationManager = getSystemService(Context.NOTIFICATION_SERVICE) as NotificationManager

        // NotificationManager에 channel 등록
        notificationManager.createNotificationChannel(channel)
    }
}

private fun displayNotification() {
    val intent = Intent(this, ChangeActivity::class.java).apply {
        flags = Intent.FLAG_ACTIVITY_NEW_TASK or Intent.FLAG_ACTIVITY_CLEAR_TASK
        putExtra("count", count)
    }

    val pendingIntent: PendingIntent =
        if(Build.VERSION.SDK_INT >= Build.VERSION_CODES.O) {
            PendingIntent.getActivity(this, 0, intent, PendingIntent.FLAG_IMMUTABLE or PendingIntent.FLAG_UPDATE_CURRENT)
        }
        else {
            PendingIntent.getActivity(this, 0, intent, PendingIntent.FLAG_UPDATE_CURRENT)
        }

    val builder = NotificationCompat.Builder(this, CHANNEL_ID)
        .setSmallIcon(R.drawable.ic_baseline_info)
        .setContentTitle(getString(R.string.notification_name))
        .setContentText(getString(R.string.notification_text))
        .setPriority(NotificationCompat.PRIORITY_DEFAULT)
        .setContentIntent(pendingIntent)
        .setAutoCancel(true)


    NotificationManagerCompat.from(this).notify(NOTIFICATION_ID, builder.build())
}
채널을 만들고, builder의 설정이 끝났다면 NotificationManagerCompat.from(this).notify(NOTIFICATION_ID, builder.build())를 통해 알림을 띄운다.
예시
https://github.com/junsu1023/Android-Study/tree/notification
GitHub - junsu1023/Android-Study: Android 공부
Android 공부. Contribute to junsu1023/Android-Study development by creating an account on GitHub.
github.com
알림창을 이용한 간단한 예시를 작성해보았다. 위에서 구현했던 코드들 또한 예시를 만들며 작성한 것이므로, 전체적으로 어떻게 작동되는지 알 수 있을 것이다.
'Android' 카테고리의 다른 글
| [Android] PendingIntent란? (0) | 2022.08.26 |
|---|---|
| [Android] TabLayout(탭 레이아웃) 구현 (0) | 2022.08.24 |
| [Android] ViewPager2 사용법 (1) | 2022.08.23 |
| [Android] Bottom Navigation 사용하기 (0) | 2022.08.21 |
| [Android] RecyclerView(리사이클러뷰) (0) | 2022.08.20 |

댓글